Why Tempering Chocolate is Difficult, and How We Found an Easier Shortcut

americastestkitchen:

image

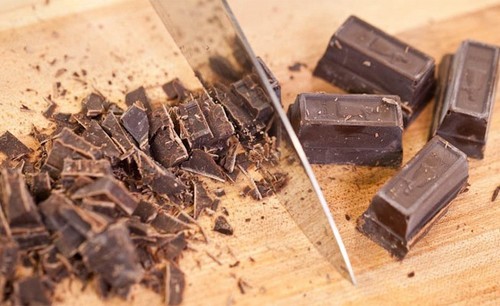
Good chocolate right out of the wrapper has an attractive sheen and a satisfying snap when you break it in two. But if you melt the chocolate to use as a coating or for drizzling and try to use it immediately, it will set up into a soft, blotchy, dull-looking mess that melts on your fingers. Why the difference?

Fantastic video. I HATE tempering chocolate so this will hopefully make that task much more enjoyable.

Easter Cupcakes

Inspired by early spring flowers (21 days early this year!), and 2 pints of blackberries I had in my fridge; I whipped up a batch chocolate cupcakes with blackberry cream cheese frosting for an impromptu Easter BBQ.

Using a tried and true chocolate cupcake recipe, I experimented a bit with the frosting, crushing and straining 2 quarts of blackberries and adding raspberry extract for an extra flavor burst.

I’m pretty sure the product didn’t disappoint!

Recipe:

Chocolate Cupcakes (adapted from the Cupcake Project):

  • 1/2 C water
  • 1/4 t salt
  • 3/4 C white sugar
  • 1/2 C Bob’s Red Mill Gluten-Free Baking Flour
  • 1 teaspoon Xanthan Gum
  • 18 oz semi-sweet chocolate chopped into small pieces
  • 1 C unsalted butter (room temperature)
  • 3 eggs
  • 3 egg whites
  1. Preheat the oven to 350 degrees F.
  2. Combine the water, salt, and sugar in a small saucepan over medium heat. Stir until completely dissolved and set aside.
  3. In the top half of a double boiler, (I use a do-it-yourself method with a small bowl of chocolate placed in a larger bowl of boiled water, it works exactly the same way.)  melt the semi-sweet chocolate.
  4. Pour the melted chocolate into the bowl of an electric mixer.
  5. Cut the butter into pieces and gradually beat the butter into the chocolate.
  6. Beat in the hot sugar-water.
  7. Slowly beat in the eggs and the egg whites one at a time.
  8. Add in the flour and xanthan gum, beat until the mixture is fully combined.
  9. Pour the batter 3/4 to the top of lined cupcake tins.
  10. Bake cupcakes for 20 minutes, or until the middle sets.
  11. Allow cupcakes to cool entirely before frosting.

Blackberry Cream Cheese Frosting

  • 1 8 oz package Neufchatel cream cheese
  • 4 Tablespoons unsalted butter, room temperature
  • 4 cups of sifted confectioner’s sugar
  • 1.5 teaspoons of raspberry extract
  • 1 pint of fresh blackberries, washed and drained
  • 1 teaspoon vanilla

Combine cream cheese and butter in an electric mixer, whip until creamy.  Add confectioner’s sugar to butter & cream cheese mixture 1 cup at a time until fully combined.  Crush, and strain blackberries, add to mixture.  Add extracts, mix until combined.  Refrigerate for at least 1 hour, or overnight.

Decorate and serve with a smile!

Peppermint-Chocolate Candy Cane Sandwich Cookies

Peppermint-Chocolate Candy Cane Sandwich Cookies (adapted from Giada)

First follow this easy sugar cookie recipe, now my absolute go-to:

Chewy Sugar Cookies (adapted from Linda McClure)

2 ¾ cups         Bob’s Red Mill Gluten-Free Baking Flour

1 tsp                baking soda

½ tsp              baking powder

1 ½ tsp           Xanthan gum

1 cup               butter softened

1 ½ cups         white sugar

1                      egg

1 tsp                gluten-free vanilla extract

3 tbs                buttermilk (can substitute with 1 tbs white vinegar in 1 cup of soymilk, then use desired amount)

Directions

Preheat oven to 375 degrees F.

In a small bowl, stir together flour, baking soda, baking powder, and Xanthan gum. Set aside.

In a large bowl, cream together butter and sugar until smooth. Beat in the egg and vanilla. Gradually blend in dry ingredients. Add enough of the buttermilk to moisten the dough and make it soft, not wet.

Roll rounded teaspoons of dough into balls and place on an un-greased cookie sheet or Silpat.

Bake for 8 to 10 minutes or until slightly golden. Let stand for 2 minutes before removing to cool on a rack.  After cookies are cooled they can be stored in an airtight container for at least a week.

Peppermint Chocolate Sandwich Prep

2 cups             semisweet chocolate chips, divided

¼ cup              heavy cream

1 tsp                pure peppermint extract

1 tsp                canola oil

8                      candy canes crushed

Combine 1 cup of chocolate chips and the cream in a small bowl. Place the bowl over a pan of simmering water and stir until the chocolate has melted and the mixture is smooth. Whisk in the peppermint extract and refrigerate the mixture for 30 minutes. Place 1 tsp of the chocolate mixture in the center of the flat side of the cookies. Place the remaining cookies on top and gently squeeze to distribute the filling evenly.

Combine the remaining chocolate chips and canola oil in a small bowl. Place the bowl over a pan of simmering water and stir until the chocolate has melted and the mixture is smooth. Brush  the top of each cookie in the melted chocolate and return to the baking sheet. Sprinkle the tops with crushed candy canes. Refrigerate until firm, about 1 hour. Store in an airtight plastic container for up to 1 week.